
This guide explain how to configure Okta with Hoop.
Requirements
- Hoop Command Line
API_URLis the public DNS name of the hoop gateway instance
Contact the administrator of the hoop gateway instance to retrieve the
API_URL address.Identity Provider Configuration
- Login with your account at https://developer.okta.com/login/
1) Create a new application
- Go to Applications > Applications and click on the Create App Integration button
- In Sign-in Method, select OIDC - OpenID Connect
- In Application type, select Web Application
2) Configure the redirect URIs
- Signin redirect URIs:
{API_URL}/api/callback
- Signout redirect URIs:
{API_URL}/api/logout
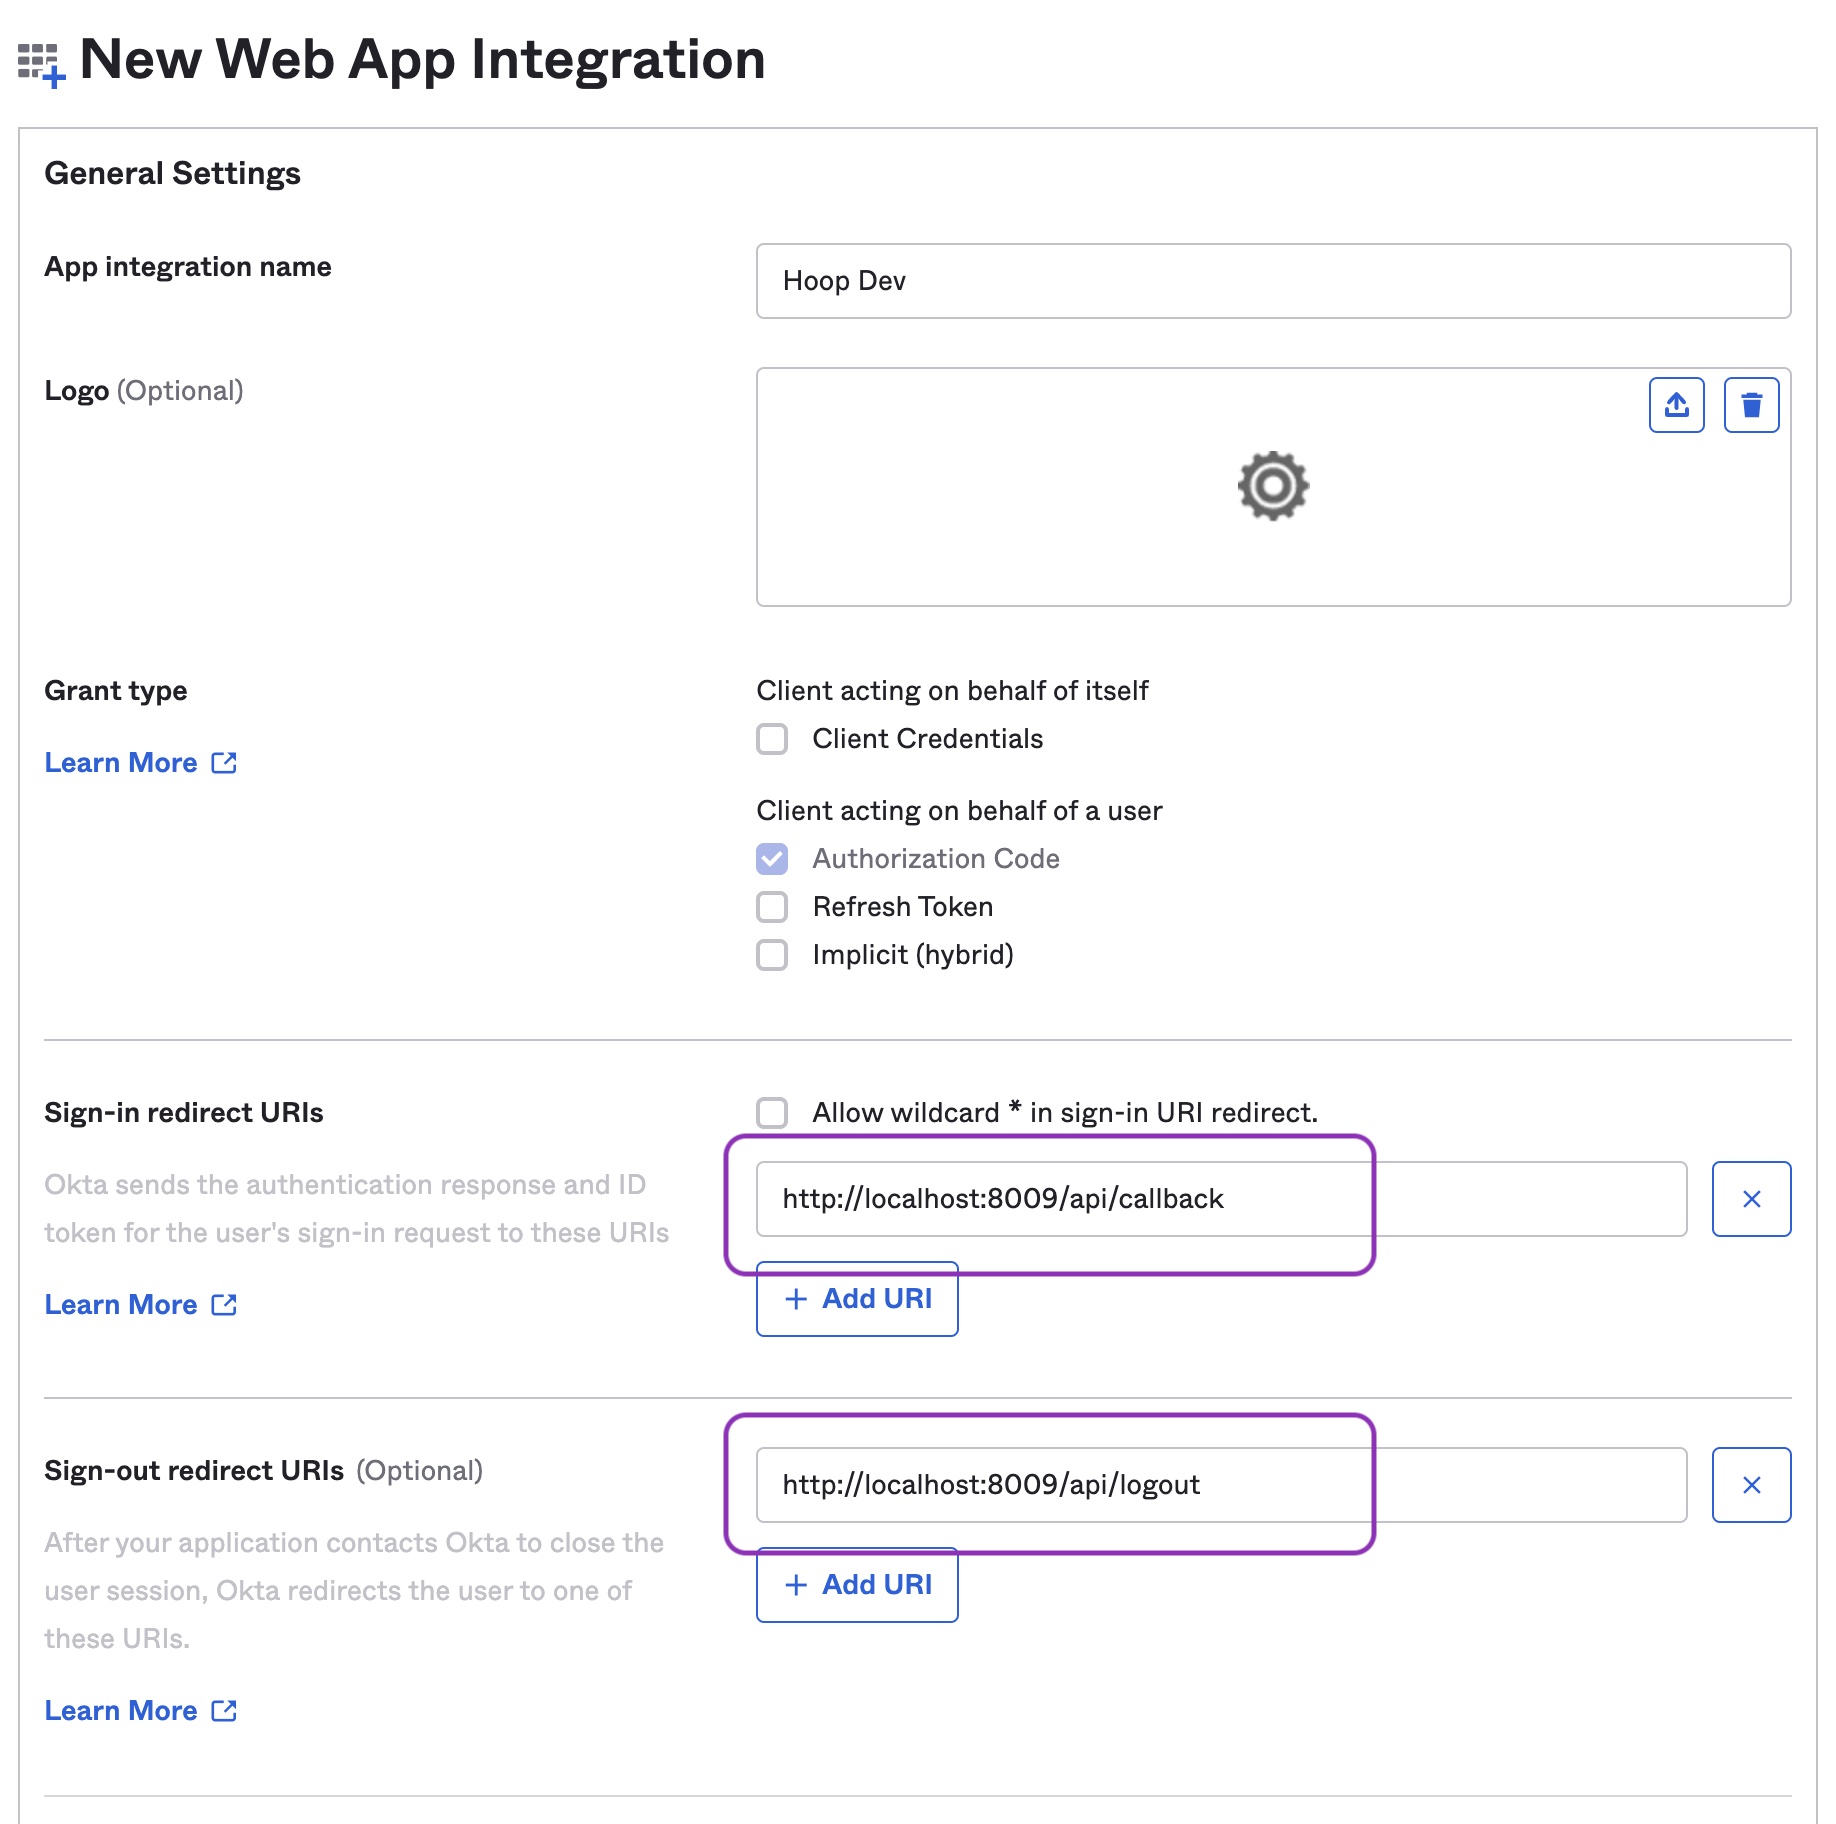
- Save the Application
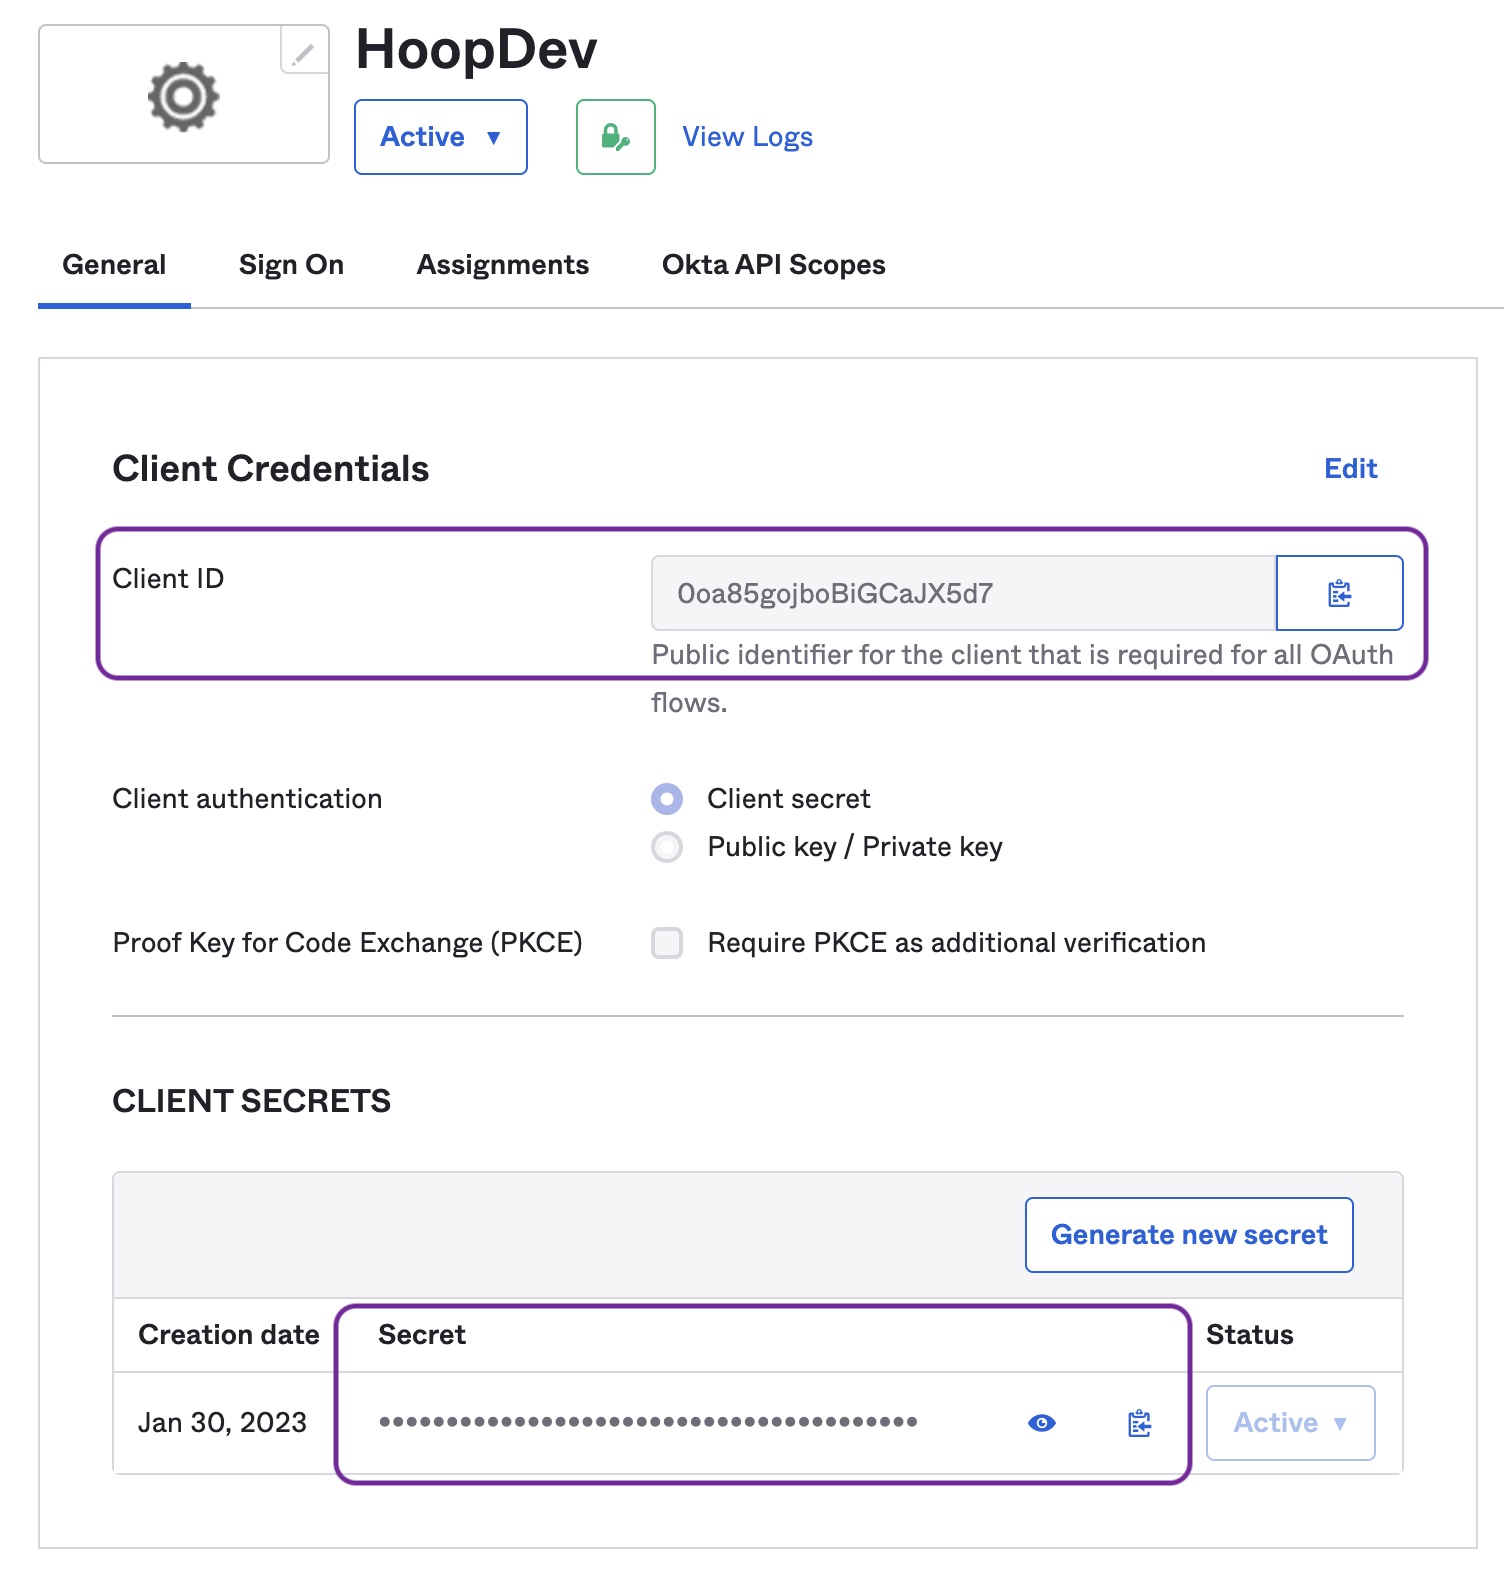
3) Collect the required information
IDP_CLIENT_ID & IDP_CLIENT_SECRET
In the Application Home
IDP_ISSUER
The Issuer URI depends on the authorization server being used. For more information, refer to this documentation.
If Okta does not have the ability to allow external applications to validate access tokens, make sure to add the query string
_userinfo=1. This indicates that the userinfo endpoint should be used.bashIDP_ISSUER=https://${yourOktaOrg}?_userinfo=1
_userinfo value is removed when it's used to exchange information with the identity provider.4) Add ‘https://app.hoop.dev/groups’ claim to ID Token (optional)
- Go to Security > API > {authorization server} > Claims
- Add
https://app.hoop.dev/groupsin the ID Token
If the above instructions are not applicable to your Okta setup, there's an alternative. You can configure it by adding a group claim to the organization's authorization server. For more details, please refer to this documentation.